
So, you’ve been working endless nights trying to get your app up and running and you’re nearly there. Most things are working; but it’s just not quite ready to be released into the Play Store; but you want people to see what you’ve done so far, or give people a teaser for what to expect. That’s the situation I’m in right now!
The question is.. how do you take a screenshot of your Android device/emulator? First thing that comes to mind is, take a normal screenshot with the image cropped at what you want, but there has got to be a better way right? Yep indeed there is – use the "Android Device Monitor". From the all knowing android developer guide:
Android Device Monitor is a stand-alone tool that provides a graphical user interface for several Android application debugging and analysis tools.
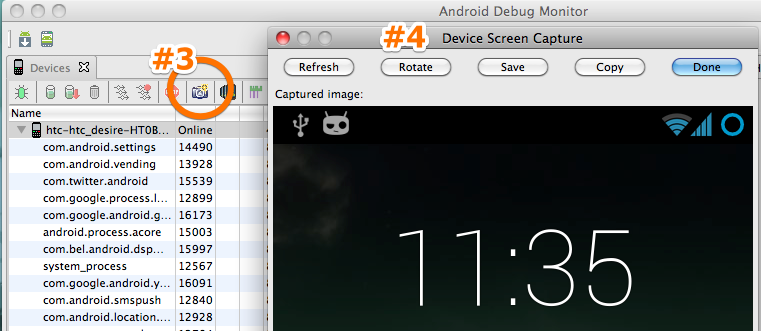
So, how do you use the Android Device Monitor to take a screenshot? Follow the steps below (note, they are Mac specific but I would imagine if you have your android dev environment set up properly, it should also work for Windows)
- Connect your device/launch the emulator
- In terminal type:
monitor(you may need to update your Android SDK) - Click on your device/emulator
- In ‘Devices’ panel, click on the camera icon
- You should now see a new window screenshot of your device/emulator which you can now save as a png
Note: I've updated this post. The old method (which still works) is to use the Dalvik Debug Monitor Service (DDMS). If you don't have 'monitor' available in your version of the Android SDK, you can achieve the same results, but in Step #2, type 'ddms' and under the 'Device' menu you should find the 'Screen Capture' option.
